Homeowner’s Checklist For Light Fixture Installation
Upgrading a light fixture is one of the most satisfying home improvement projects. It can instantly refresh a room’s look and improve its functionality. However, the process involves working with electricity, which demands respect and careful attention to safety.
A successful installation of a light fixture requires the right tools, a methodical approach, and a clear understanding of the steps involved. This comprehensive checklist is designed to guide you through the entire process, from preparation to the final flip of the switch, making sure your ceiling light fixture installation is both safe and successful.
Pre-Installation: Preparation and Safety First
Proper preparation is the most important part of any electrical project. Rushing this stage can lead to mistakes, damage, or injury.
- Gather Your Tools and Materials
Before you even think about touching a wire, make sure you have everything you need. There is nothing worse than being on a ladder with wires exposed and realizing you are missing a key tool. You will likely need:
- New light fixture
- Voltage tester (non-contact)
- Screwdrivers (flat-head and Phillips)
- Wire strippers
- Wire connectors (wire nuts)
- Ladder (a stable one!)
- Electrical tape
- Wire cutters
- Work gloves and safety glasses
- Prioritize Safety: Turn Off the Power
This is the single most important step, and it should never be skipped.
Begin by going to your main electrical panel and finding the circuit breaker that supplies power to the light fixture you’re replacing. Flip the corresponding breaker to the OFF position. Once that’s done, return to the room and confirm that the power is off by toggling the existing light switch; the light should remain off. To be completely sure, use a non-contact voltage tester.
Remove the old fixture’s cover to expose the wires, then hold the tester close to the black (hot) and white (neutral) wires. If the tester does not beep or light up, you can be confident that the power is safely off.
- Assemble the New Fixture
Many new lights come partially disassembled. Lay out all the parts on a clean, soft surface like a rug or towel to prevent scratches. Follow the manufacturer’s instructions to put together the main components, but often it is easier to wait and attach the fixture to the ceiling electrical box first before adding fragile parts like glass shades or crystals. This reduces the risk of dropping and breaking them while you work.
The Installation Process: A Step-by-Step Guide
With preparation complete, you can move on to the core of the ceiling light fixture installation.
- Remove the Old Fixture
Begin by removing the old light fixture. Carefully unscrew and take off any glass globes, shades, or decorative components attached to it. Once those parts are removed, you’ll see the fixture’s base secured to the ceiling.
Unscrew the mounting hardware that holds the base plate to the electrical box, keeping one hand under the fixture to support its weight as you remove the final screw. Gently lower the fixture to reveal the wires inside the box. Before continuing, use your voltage tester again to make sure the exposed wires are not live.
- Disconnect the Wires
Next, disconnect the wiring. The old fixture will likely be attached to the house wires with wire connectors. Twist these connectors counterclockwise to remove them, then carefully separate the wires.
At this point, the old fixture should come free. Take a moment to observe how the wires were connected before you proceed. Typically, the black (hot) wire connects to black, the white (neutral) wire connects to white, and the bare copper or green (ground) wire attaches either to a green grounding screw or another ground wire inside the electrical box.
- Install the New Mounting Bracket
Most new fixtures come with a custom mounting bracket. Remove the old one that was screwed into the electrical box. Replace it with the new bracket from your fixture kit, making sure it is securely fastened. This bracket is what will hold the weight of your new light, so it must be tight.
- Connect the Wires
This step forms the core of the electrical installation. Begin by connecting the ground wire. Attach the fixture’s green or bare copper wire to the ground wire inside the electrical box, or to the green grounding screw on the mounting bracket.
Once that’s secure, move on to the main connections. Match the wire colors: connect the black wire from the fixture to the black (hot) wire from the ceiling. Twist the wire ends together in a clockwise motion, then fasten a new wire connector over them until it feels snug. Give each wire a gentle tug to ensure the connection is firm. Repeat the same process with the white (neutral) wires.
When all connections are complete and secure, carefully fold and tuck the wires back into the electrical box to keep them organized and out of the way.
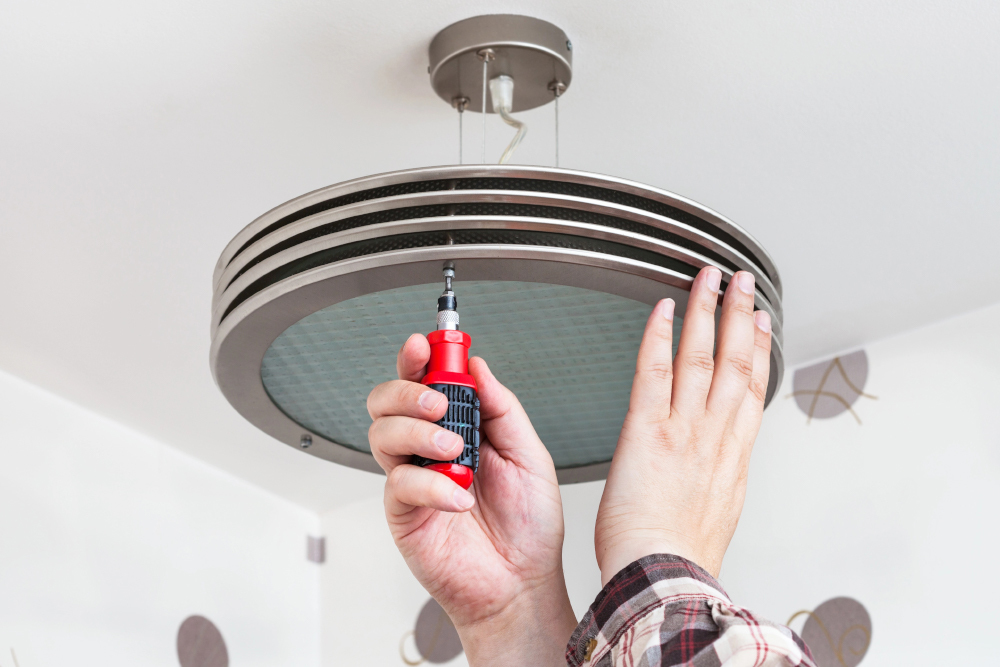
- Mount the Fixture
Begin by mounting the new fixture. Lift it carefully and line it up with the mounting bracket on the ceiling. Follow the manufacturer’s instructions to secure it in place. This often involves threading the provided screws through the base of the fixture and into the bracket, or tightening a locking nut until it holds firmly.
Once secured, make sure the fixture sits flush against the ceiling and does not wobble.
- Add Bulbs and Final Touches
Next, install the light bulbs that are recommended for the fixture. Check the label to confirm the maximum wattage and do not exceed it. After the bulbs are in place, reattach any remaining glass shades, globes, or decorative pieces.
When everything is secure, you can restore power to the circuit and test your newly installed light fixture.
Post-Installation: Testing and Troubleshooting
Your job is not quite done once the fixture is physically installed.
- Restore Power and Test
To restore power and test your installation, return to the electrical panel and flip the circuit breaker back to the ON position. Go back to the room and turn on the light switch. If the fixture illuminates, your installation was successful.
If the light does not turn on, don’t worry. Switch the light off, then head back to the electrical panel and turn the breaker off again. Double-check all wire connections to ensure they are tight and properly matched. Make sure the wires are fully seated inside the connectors and that no bare wire is visible below them. Most issues stem from a loose or incorrect connection. Also, confirm that the light switch itself is working properly.
- Perform a Final Safety Check
Once the fixture operates correctly, perform a final safety check. Let the light run for about 15 minutes, then carefully touch the area around the fixture; it should feel warm but not hot. Excessive heat may indicate the use of bulbs with too high a wattage or a wiring issue.
Next, look at the fixture from below to confirm that it is level and firmly attached. Give it a gentle push to ensure it doesn’t wobble or sag. Finally, listen for any unusual buzzing sounds, which may suggest a loose component or an incompatibility with a dimmer switch.
When to Call a Professional for Light Fixture Installation Service
While many light fixture replacements are straightforward, some situations absolutely call for a professional light fixture installation service. Knowing your limits is a key part of being a responsible homeowner. Attempting complex electrical work without the proper training can lead to fire hazards, electrical shock, or costly damage to your home’s wiring.
A professional electrician does not just connect wires; they make sure the entire system is safe and up to code, which protects your investment and your family.
- No Ground Wire: If your home’s electrical box does not have a ground wire, you need an electrician to assess the situation. Modern fixtures require a ground for safety, and its absence often indicates older wiring that may need an upgrade.
- Unlabeled or Unsafe Wiring: If you open the electrical box and find wiring that is damaged, cracked, or does not follow the standard black/white/copper color code, stop immediately. This could signal a previous DIY mistake or deteriorated insulation that requires expert repair.
- The Fixture is Very Heavy: Standard ceiling electrical boxes are designed for a certain weight. A heavy chandelier or ceiling fan may require a special reinforced box, which a professional can install to prevent the fixture from falling.
- You Want to Relocate the Fixture: Moving a light fixture to a new location involves running new wiring through walls and ceilings, a job that should always be handled by a licensed electrician to avoid piercing studs or creating fire hazards inside walls.
- You Simply Don’t Feel Comfortable: There is no shame in hiring a pro. Your safety and the safety of your home are what matter most. A qualified expert can complete the job efficiently and correctly, giving you lasting peace of mind.
This same careful approach applies to other electrical projects. For example, proper outlet and switch installation is just as important for the overall safety and functionality of your home’s electrical system. Knowing when a task is within your skill set and when it poses a significant risk is the mark of a savvy homeowner.
Completing a light fixture installation on your own can offer a great sense of accomplishment. By following this detailed checklist, you have taken the necessary steps to make sure the project was completed safely and correctly. You have not only improved the look of your home but also gained a better understanding of its electrical systems.
Remember, the goal is always a beautiful, functional, and, above all, safe outcome. If you tackle the project yourself or call in an expert, this checklist empowers you to manage the process with confidence.